


How to Jumpstart a Car – 10 Simple Steps to Help You

Have you ever experienced this? You get in the driver’s seat of your car and drive your kids and yourself to school and work respectively. Although you are ready to go off straight immediately, nothing happens when you turn the ignition. Your engine may make a few clicks or erroneous sputters. Then again, what else? Nothing.
You must be fully aware of what has happened. You would be obviously wondering how to jumpstart a car. Some drivers receive automatic contact from their roadside assistance provider when their battery dies.
You can really resolve this issue on your own, easily jump-starting your engine and getting you out on the road in no time, provided you have the right equipment and a little bit of knowledge.
1. How to Jumpstart a Car
You have likely gone through being in this situation before. When you try to start your car, nothing occurs. There were only a few clicks audible. To get your car back on the road, you need to find a solution straight now.
If you were preparing, you most likely already have a trustworthy pair of jumper wires in your vehicle. The only thing you require right now is the ability to jump-start an automobile battery.
1.1. Finding the Best Jumper Cables
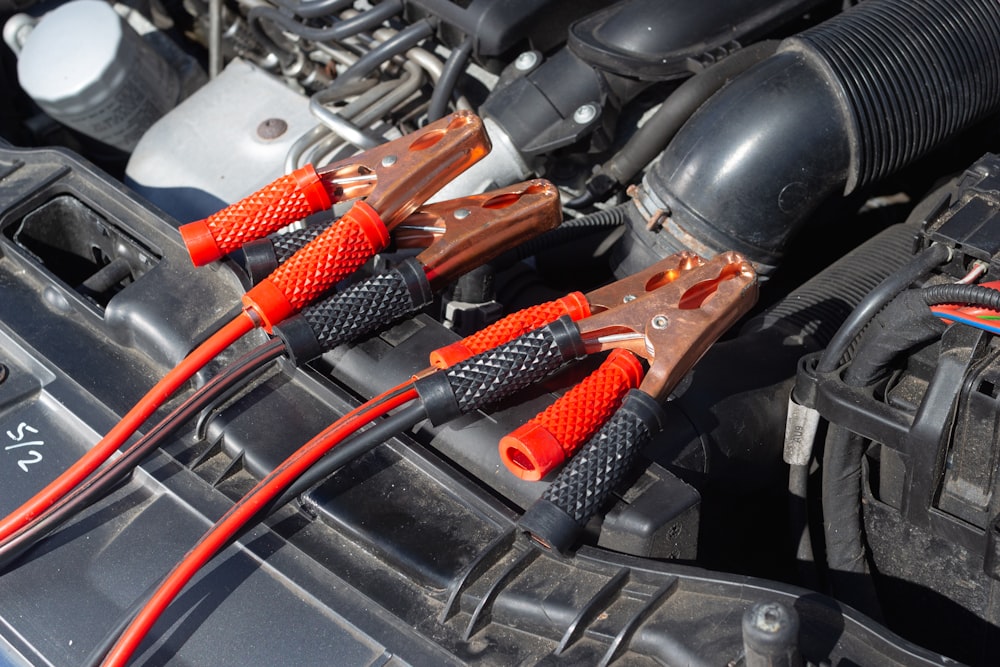
Not much equipment is needed to jump-start a car battery. To use it as a jumper, you must first locate a running car. Make sure the drivers are comfortable with each other before raising the hood, identifying the battery, and checking the battery’s connections.
Due to their low cost and ease of storage, jumper cables are the most common instrument used to jump-start autos. Jumper cables are typically sold between 10 and 20 feet in length. Some people think longer wires are better so you don’t have to relocate a car with a weak battery.
Longer cables could be more practical, but they increase the chance of power loss because of the longer distance over which the energy must travel. The gauge of the cable determines its strength. With a reduction in gauge, cables become thicker and stronger. Gauge six wire is commonly used to make jumper wires.
1.2. Ensuring Safety
You should consider all potential safety issues before performing any normal maintenance or repairs on your car. While you learn how to jump a dead vehicle battery, make sure that little children are restrained away from the engine. Take time to read the manual for your automobile.
Some vehicles require additional safety measures in order to effectively leap. Consult your nearby auto care facility for advice if you’re unclear about what to do. You should use caution to prevent potentially hazardous electric shocks if your car can handle a leap.
When utilizing jumper cables, keep in mind that their main function is to move electrical current from one car to another. Do not make contact with anything other than the intended target with the unpainted metal section of the metal clamps after attaching one end of the jumper wires to an automobile. Wearing protective glasses can also be a good idea in case sparks start flying.
So, now you know that you should find the best jumper cables and then ensure safety, and then what? If you are wondering how to use jumper cables, then I don’t want you to keep waiting, let’s move into that topic.
2. Steps to Jumpstart a Car
2.1. Step-1:
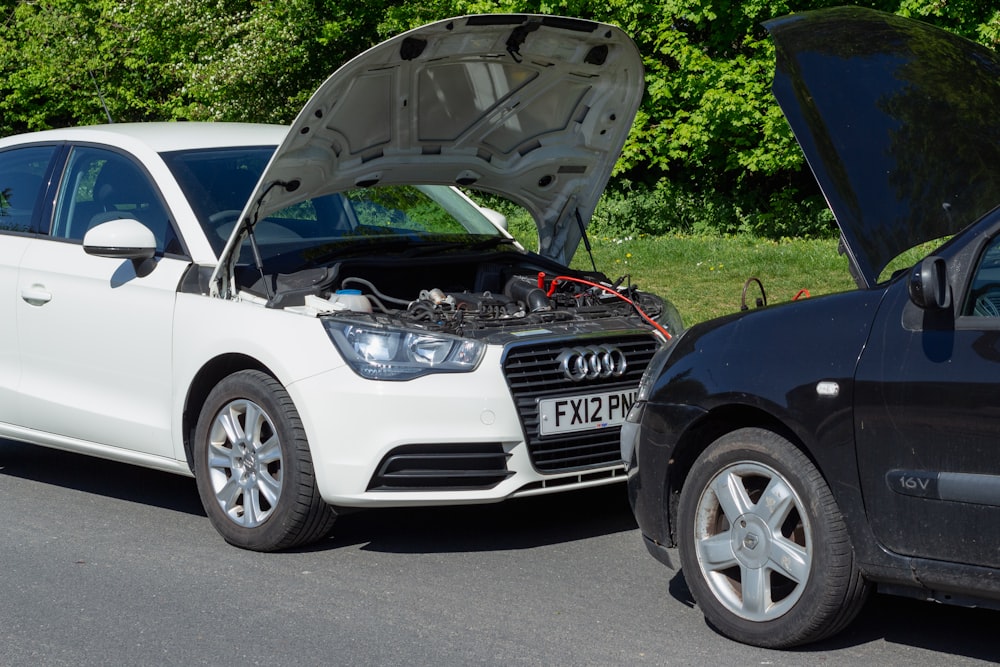
The initial step is to position the automobiles next to one another. The working vehicle should be parked such that the other vehicle is facing it and that they are, at most, 18 inches away from one another.
If the car has an automatic transmission, put it in the park; if it has a manual transmission, put it in neutral. Both cars should be equipped with parking brakes to avoid sudden movement.
2.2. Step 2:
Switch off both vehicles. Set the parking brake. The automobiles should be shut off, and the keys should be taken out. When you set the jumper wires on the ground, make sure the clamps don’t touch.
Jumper cables should be connected as soon as feasible. Search for the batteries and battery connections by opening the hoods of both vehicles. The two terminals of each battery are frequently painted red or black and have a + or – sign on top.
Make sure you can tell by looking at them which batteries are positive and which are negative. Your jump will only succeed if you can differentiate. If required, wipe off the battery terminals with a wire brush or cloth.
2.3. Step-3:
Connect one red clamp to the battery’s positive wire. Connect the red positive wire clamp to the dead battery’s positive (+) battery connection. To make a secure connection to the battery terminal, you might need to relocate the clamps first.
2.4. Step-4:
Connect the second red clamp to the active battery’s positive terminal. Connect the jumper cables’ opposite end’s red, positive cable clip to the operating car’s positive (+) battery connector.
2.5. Step 5:
A negative (-) battery connector from a working battery should be connected to a black negative cable clamp.
2.6. Step-6:
Connect the black clamp that is provided to the engine block’s proper nut or bolt. Make your way to the car with the battery that is dead. The dead battery should not be connected to the black, negative cable clamp.
Instead, fasten that clamp to an uncoated, uncoated surface of the metal of the automobile, such as a spotlessly clean nut on the engine block. The leap will be safer as a result.
Now that you’re ready, test out the jump-start and know how long it should take to charge a dead car battery.
To learn how to and how long to charge the dead battery in your automobile, follow the procedures listed below.
2.7. Step-7:
Turn the engine on the working vehicle and let it run for a short period. Turn on the functional vehicle. Wait for a moment. Wait a short while. Depending on how recently the battery died and how old the battery was, you might need to let the car run for a minute or two for the jump to take effect.
2.8. Step-8:
Start the dead automobile. It should switch on. Attempt to restart the dead car. If the car won’t start, wait a few seconds for the running car to complete charging the battery before attempting to start it again.
2.9. Step-9:
Try revving the engine of the functional vehicle if the car still won’t start. Rarely, it could be advantageous to give the running car a tiny rpm while the dead battery is being recharged.
2.10. Step-10:
After the black jumper cables have been unplugged, carefully disconnect the red ones. You may remove the jumper cables once the dead car has started, starting with the clamps on the negative, black cable. Avoid letting the cable clamps touch while any part of the wires is still secured to a car.
2.11. Step-11:
Drive briefly to aid battery recharging. Take a little drive now. The battery will be able to charge as a result. By doing this, you may be sure that your car won’t crash when you turn it off again and you can allow the alternator to replenish the battery.
3. What to Do if the Jump-Starting the Dead Battery is Unsuccessful?
If the jump doesn’t work to start your car after a few quick tries, or if it starts but then dies again, there may be other issues that need to be fixed. A normal battery lasts between four and six years. If the battery seems to be working well, you should investigate any other potential problems with other parts.
If you are unclear about what is wrong, bring the car to your local car care center for servicing and repair. Free battery inspections and diagnostic scans are available at many nearby sites, and they will explain any issues with your automobile.
It’s annoying to deal with a dead automobile battery. Fortunately, maintaining your car is not that difficult. Your automobile will operate better, be safer, and survive longer if you adhere to these recommendations, use your jumper cables appropriately, exercise safety, and take care of any other potential issues. Ask your neighborhood technician at the vehicle repair shop for professional advice and assistance.
4. Why Does the Car Battery Can No Longer Hold a Charge or Keeps Degrading?
For the sake of argument, assume that you can successfully jump your car’s battery and arrive at your destination. Then, when you try to start your engine once more, you get the same problems like sputters and clicks, which are all clear indications of a dead battery.
It only signifies that your battery wasn’t able to maintain its charge properly the first time if it dies twice in a row like that. So what causes a car battery to drain? Let’s find out about that below.
4.1. The Causes of a Charge’s Failure
Among the most typical reasons for a battery’s failure to hold a charge are:
- You kept your lights on or other battery-powered devices running even while the car wasn’t moving.
- Even whilst you were driving, the battery was really not charging. The service professionals can help you with this mechanical problem since it has to be fixed.
- Simply, you didn’t keep the automobile on the road for very long after you jumped it. To make sure the battery gets a good charge, you should leave the engine running for at least a few minutes. It’s recommended to take a 20-minute drive around town.
- The alternator is probably definitely to blame for the battery’s parasitic electrical depletion, which is taking place in the electrical system.
- Simply said, the battery is extremely dated and won’t last very long on a charge. In this case, a replacement is necessary. That may be handled for you by the vehicle care center.
These are the most likely causes of your battery issues, albeit they are not the only ones that might be to blame.
4.2. Finding the Problem
Here are some diagnostic tips to assist you to figure out which of these situations you’re dealing with.
- Put on your headlights first. The starter or wiring is more likely to be the problem than the battery if they switch on at their normal brightness. If the lights only weakly or never come on, the battery is more likely to be the problem.
- The voltmeter’s positive terminal should have the red lead attached, and the negative terminal should have the black lead.
- If the battery does not read over 12.6 volts, it is not fully charged, then there is unquestionably an issue with the charging process.
- Next, think about the battery’s state of health. Do you see any visible corrosion or wear and tear? Is this item older than four years? If so, replacing the battery could be the simplest course of action.
- Lastly, think about whether the issue is connected to your alternator. Frayed or fractured alternator cables are a clear sign that something is amiss and should not be present. An issue with the alternator may also exist if the car stalls after being jump-started and the battery quickly loses its charge.
These methods can assist you in figuring out why your battery won’t hold a charge, but what if it won’t even start? There might be a lot of potential reasons why your engine won’t start even after you have followed my precise instructions.
5. Why Won’t Your Engine Start?
One of the following is likely to be the reason for your unsuccessful attempts to restart the battery:
- To begin, it’s probable that the terminals of your car battery need to be properly cleaned. We’ll soon offer some guidance on this.
- Your battery can also be too old and unable to be repaired, in which case it has to be replaced.
- Additionally, keep in mind that there may be additional technical issues with the car, such as blown fuses or a broken alternator.
6. How to Clean a Car Battery?
A mechanic will probably be required to repair your car if it has a technical problem or an out-of-date battery. You can take care of it yourself, though, if the only problem is that your battery’s terminals need to be cleaned.

To make sure your battery connections are immaculate, adhere to the following rules:
- Turn off your engine first and foremost. Even while cleaning the terminals is a pretty straightforward DIY project, there is a very slight possibility of harm. You may simply lessen this risk by turning off the engine while operating.
- The nut holding the negative wire in position has to be removed next. For this, a tool is probably necessary. It is necessary to take the cable down from the post. After that, connect the positive cable in the same way.
- For a limited length of time, visually inspect your car battery. You’ll likely need to replace the batteries if you see anything strange, like a crack, which indicates that your car battery has an issue that you can’t likely address on your own.
- Directly inspecting the wires and clamps is also recommended. Once more, you’re searching for obvious symptoms of deterioration. You should absolutely repair your wires and clamps if they have noticeable rips or tears. These problems can’t really be solved.
- If none of these blatant indications of wear and tear are present, prepare your cleaning solution by mixing one tablespoon of baking soda with one cup of water. Once you’ve thoroughly blended them, dunk an old toothbrush into the mixture.
- Use the toothbrush to remove any rust you find on your battery connectors. Do not be afraid to scrub anything very thoroughly in order to get it completely clean. You might need to repeatedly dip your toothbrush into the baking soda solution while you scrub.
- Use a spray bottle to quickly rinse any remains with cool water once you’re through. Be sure to completely clean away any baking soda that might cause corrosion. After that, use an old rag or towel to thoroughly dry the batteries and clamps.
- To lubricate the terminals, spread some petroleum jelly over them.
- Reconnecting the wires to the correct terminals is necessary.
The above guidelines are the basis for cleaning your battery terminals, however here is an alternate approach: Try finding a Pepsi or a Coca-Cola and pouring it over the terminals if you’re traveling and don’t have access to the aforementioned items.
Allow your battery to sit for two to three minutes, then thoroughly wash it with cold water. You should follow the same basic safety procedures that we outlined above, such as turning off your engine and unplugging the connections.
Final Words
Of course, it’s preferable to avoid battery death completely. This is not frequently possible. Even the battery of the fastest car in the world will eventually get old and might not jump-start. While all batteries ultimately run out of juice, there are a few things you can do to prolong their life.
- Make sure to include routine battery testing in your maintenance schedule.
- Protect your battery from inclement weather.
- If you won’t be driving the car for a few weeks, get a friend to start it for you while you’re away and give it a little spin around the block. The battery will remain charged as a result of this.
You might perhaps increase the lifespan of your automobile battery by doing routine, preventative maintenance!
Read more from us here.


